
We generally recommend running OwnCDN as an IIS website. See How to get started with OwnCDN
Download the version of OwnCDN meant for running from the command line ("owncdn-x-x-x-cmd.zip")
See https://owncdn.com/download
Unblock the downloaded file
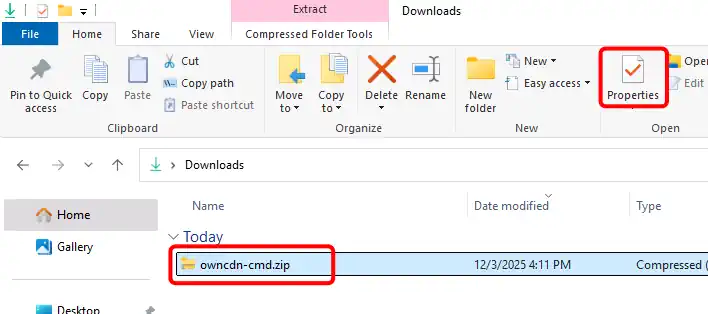
Open the folder where you downloaded the "owncdn-cmd.zip" file to in File Explorer, select the downloaded file, and click the "Properties" button:
(or right-click on the file and select "Properties" from the context menu)
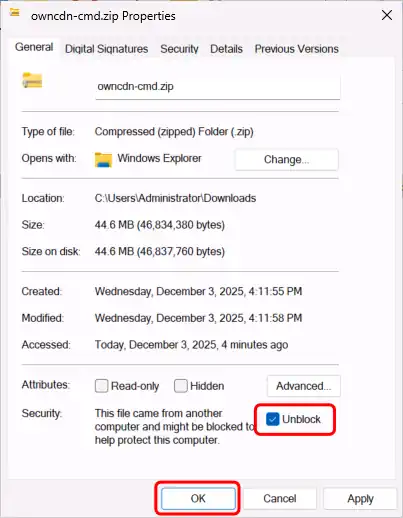
In the file Properties dialog, check the "Unblock" checkbox under "Security", and click the "OK" button:
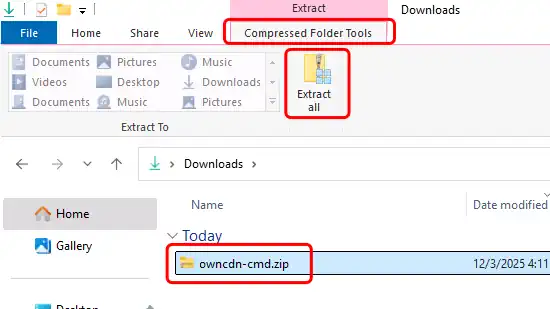
Un-zip the file
Open the folder where you downloaded the "owncdn-cmd.zip" file to in File Explorer, select the downloaded file, select the "Compressed Folder Tools" tab, and click the "Extract all" button:
(or right-click on the file and select "Properties" from the context menu)
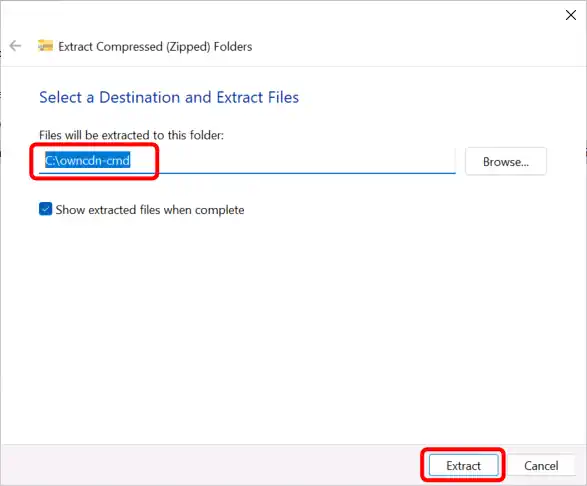
Specify the folder where you want the files extracted to (use a new / empty folder), and click the "Extract" button:
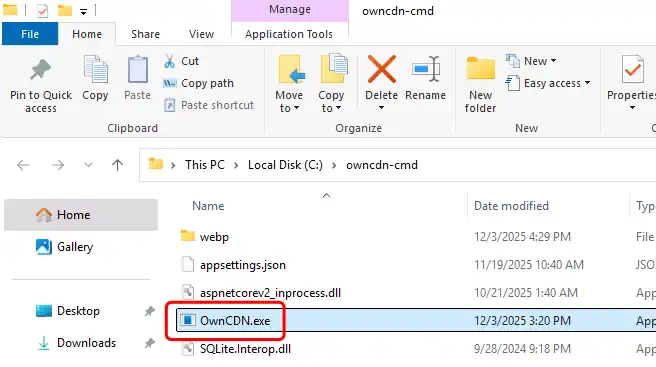
Run OwnCDN
A new File Explorer window will open showing the extracted files. Double-click the "OwnCDN.exe" file:
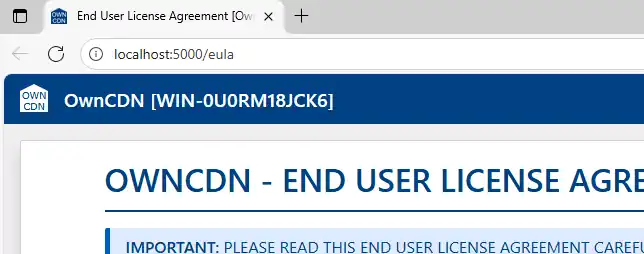
OwnCDN will listen for HTTP requests on an available port-number (defaults to port 5000).
Copy the address shown in the terminal window to your browser:

The OwnCDN user interface should show up in your browser (starting with the EULA):
Use alternate port number / endpoint
You can specify the endpoint that OwnCDN should listen for HTTP requests on like this:
owncdn.exe --urls http://127.0.0.1:12345
For more details see Configure endpoints for the ASP.NET Core Kestrel web server
Use alternate data location
You can specify the location of the data files using the command line option --data_dir like this:
owncdn.exe --data_dir C:\owncdn-data
This may be combined with --urls and other options.